

How to Mark a Golf Ball So It Stays Easy to Identify
A practical guide to choosing patterns, testing ink durability, maintaining clarity, and avoiding confusion on the course
Marking a golf ball may seem straightforward, but an effective identification system must remain reliable under quick recognition demands, wear and tear, alignment routines, repeatability across multiple balls, and real playing conditions. Many golfers waste valuable time on the course trying to confirm ball ownership because their mark is unclear, identical to another player's, or has worn away.
A successful ball-marking method must consider ink type, pattern complexity, mark placement, drying time, relationship to alignment aids, and durability through grass contact, sand, rain, and cleaning. A mark that looks distinctive in your hand but becomes difficult to spot at address, or fades after a few holes, is not an effective identification system.
Marking is not decoration. The primary purpose of a ball mark is rapid, accurate identification of your ball, especially when multiple players are using the same brand and model.
1. Choose a Simple, Repeatable Pattern
Before you mark any ball, design a pattern you can reproduce consistently across all the balls in your bag. The mark should be instantly recognizable on the ground, in your bag, next to another player's ball, and when you're standing over it at address.
- Select a pattern you can draw in under three seconds: short lines, initials, dot patterns, or simple geometric shapes.
- Avoid overly detailed drawings or complex designs requiring multiple colors.
- Ensure the pattern is recognizable from any rotation angle, or always mark in the same fixed location.
- Consider using two different marks: one for identification, one for putting alignment.
- Test whether your pattern is clearly different from the marks used by your regular playing partners.
- Try several patterns on practice balls first to find the one that's easiest to recognize and reproduce.
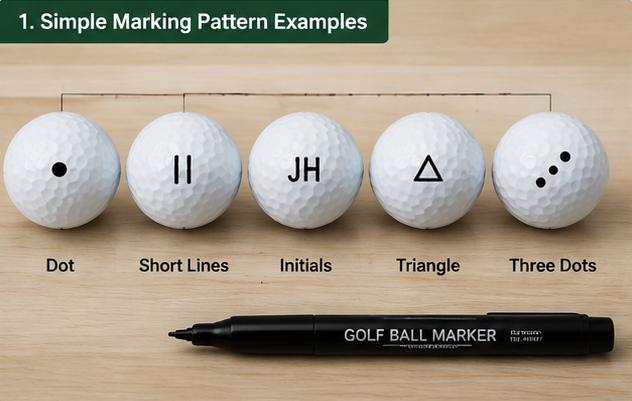
Choose a simple pattern that remains instantly recognizable from any viewing angle
Do not rely on the manufacturer's logo or number alone. When multiple players in your group use the same brand and model, additional personal marking becomes essential for rule compliance and pace of play.
2. Test Your Marking Pen Before Use
Not all permanent markers are equally suitable for golf balls. The ink must adhere properly to the ball's surface, dry quickly, resist smearing during play, and remain visible through normal wear without bleeding or fading.
- Surface compatibility: Test the pen on a scrap ball or the same model you play to check ink flow and adhesion.
- Drying time: Wait the full recommended drying period before touching the mark or placing the ball in your pocket.
- Smear resistance: After the mark has dried, rub it gently with your thumb to check whether the ink transfers.
- Water resistance: Test whether the mark survives brief water immersion or wet grass contact.
- Color visibility: Choose a color that contrasts clearly with the ball surface.
- Storage stability: Keep your marking pen capped to prevent the ink from drying out between rounds.
Specialty golf ball markers often perform better than general-purpose permanent markers because they are formulated for the urethane or ionomer covers used on modern golf balls.
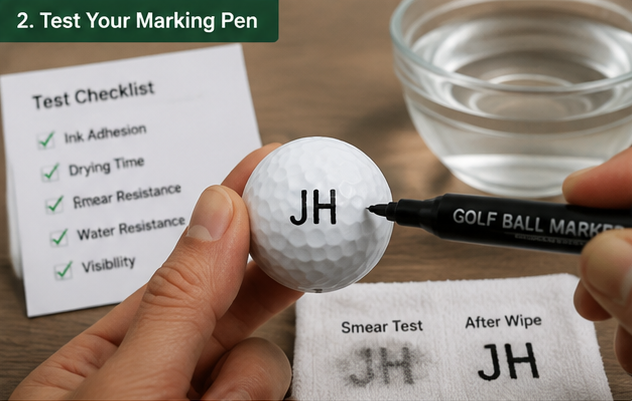
Test ink adhesion, drying time, and smear resistance on a practice ball before marking your playing balls
Clean the ball surface before marking. Dirt, moisture, sunscreen, or residue from previous marks can prevent proper ink adhesion and cause premature fading or smearing.
3. Position Marks Away from Alignment Aids
Your identification mark and any alignment line you use for putting should serve different purposes and occupy separate areas of the ball. Combining them can create confusion during address and make the mark harder to spot when the ball is in play.
- Place your identification mark on a clean area that won't be covered by your alignment routine.
- If you use an alignment line for putting, position your personal mark 90 degrees away or on the opposite pole.
- Avoid placing marks directly on the ball's equator where they might interfere with face contact at address.
- Keep the mark away from the manufacturer's logo if you use it as secondary identification.
- Document your marking system with a photo to maintain consistency across new ball purchases.
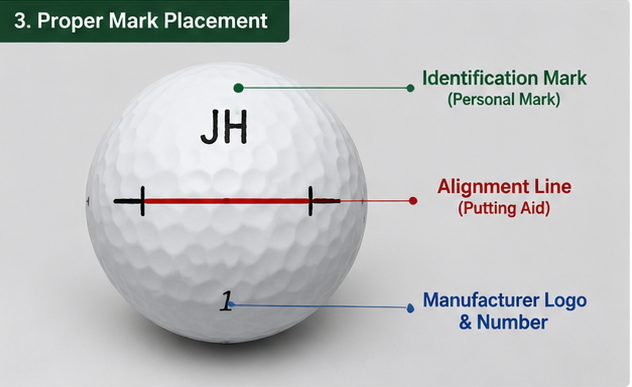
Keep your personal identification mark separate from alignment aids and manufacturer markings
Do not cover the entire ball with marks. Excessive marking can create visual distraction at address and may violate equipment rules in formal competition.
4. Allow Full Drying Time Before Play
Even permanent ink requires proper curing time to achieve full adhesion and durability. Rushing this step leads to smeared marks, ink transfer to your glove or pocket, and identification problems during the round.
- Follow the manufacturer's drying recommendation: Most golf ball markers require 30 seconds to 2 minutes of air drying.
- Mark balls the night before your round: This ensures complete curing and eliminates any risk of smearing.
- Keep marked balls separated: Lay them on a clean towel while drying to prevent contact between wet marks.
- Avoid immediate pocket storage: Wait until the ink is completely dry before putting balls in your pocket or bag.
- Work in a clean environment: Mark balls away from dust, grass clippings, or other debris that might stick to wet ink.
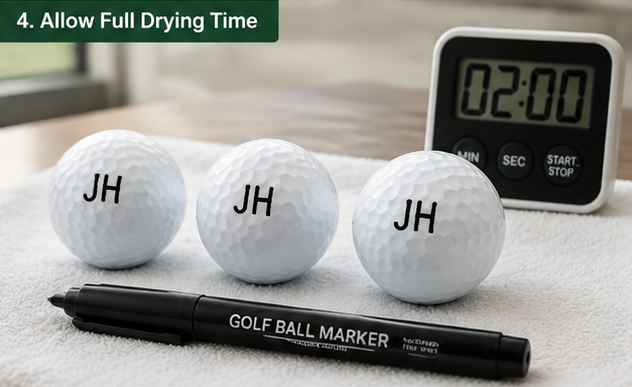
Allow marked balls to dry completely on a clean surface before storage or play
5. Monitor Mark Clarity During Play
Even properly applied marks degrade over time through normal play. Regular inspection helps you identify when a ball should be replaced or re-marked to maintain clear identification throughout the round.
- Check your ball's mark every few holes, especially after shots from rough, sand, or cart paths.
- Replace balls when marks become faded, smeared, or difficult to distinguish from dirt or scuff marks.
- Clean the ball regularly during play to keep the mark visible and prevent dirt buildup.
- Carry your marking pen for mid-round touch-ups if your mark becomes unclear.
- Keep track of which ball you're playing to avoid confusion when switching to a new one.
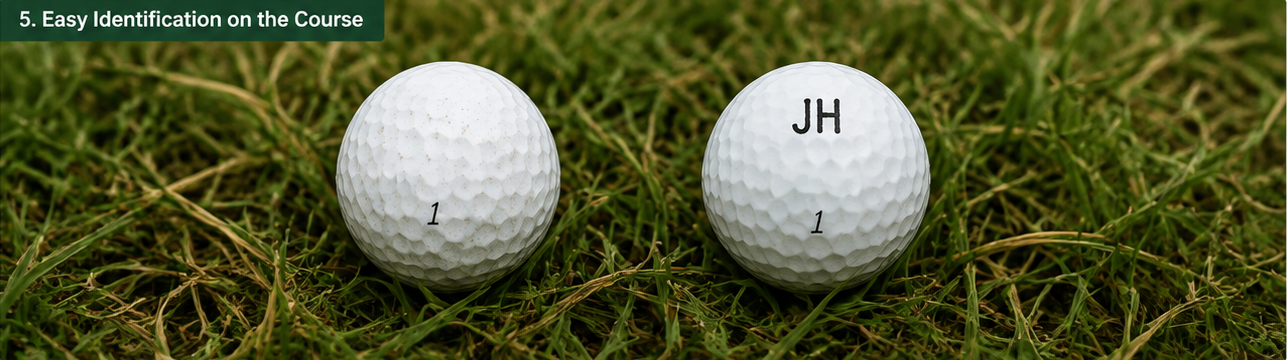
A clear identification mark allows instant recognition when multiple similar balls are in play
For tournament play, be prepared to describe your ball's unique marking in detail if asked by an official or fellow competitor. A clear, distinctive mark helps prevent penalties for playing a wrong ball and speeds up identification in shared rough or hazard areas.
Keep your marking system consistent. Changing your pattern frequently makes identification harder and increases the risk of confusion when you find a ball marked with an older system.
6. Establish a Pre-Round Marking Routine
Treating ball marking as part of your standard pre-round preparation ensures you never tee off with unmarked or poorly marked balls.
- Mark new balls immediately after purchase: Store them marked and ready rather than marking them on the first tee.
- Inspect all balls before the round: Check that marks are clear, properly dried, and consistent.
- Mark backup balls identically: Use the same pattern on balls stored in your bag, car, or locker.
- Keep your marker accessible: Store your pen in an easy-to-reach pocket for on-course touch-ups.
- Document your pattern: Take a photo of a properly marked ball so you can replicate the design.
For competitive players, confirm that your marking system complies with the Rules of Golf. Marks must be for identification only and must not be excessive or distracting.
Mark Once, Recognize Instantly
An effective golf ball marking system provides instant identification under all playing conditions without interfering with your pre-shot routine, alignment aids, or pace of play. Choose a simple pattern, test it thoroughly, apply it consistently, and maintain mark clarity throughout each round.
Before your next round, mark all playing balls with a tested pattern, allow full drying time, and verify that the mark remains clearly visible after normal handling.